Showing posts with label DIY. Show all posts

Tuesday, August 19, 2014

DIY Denim Cutoffs - Sequin Party Shorts


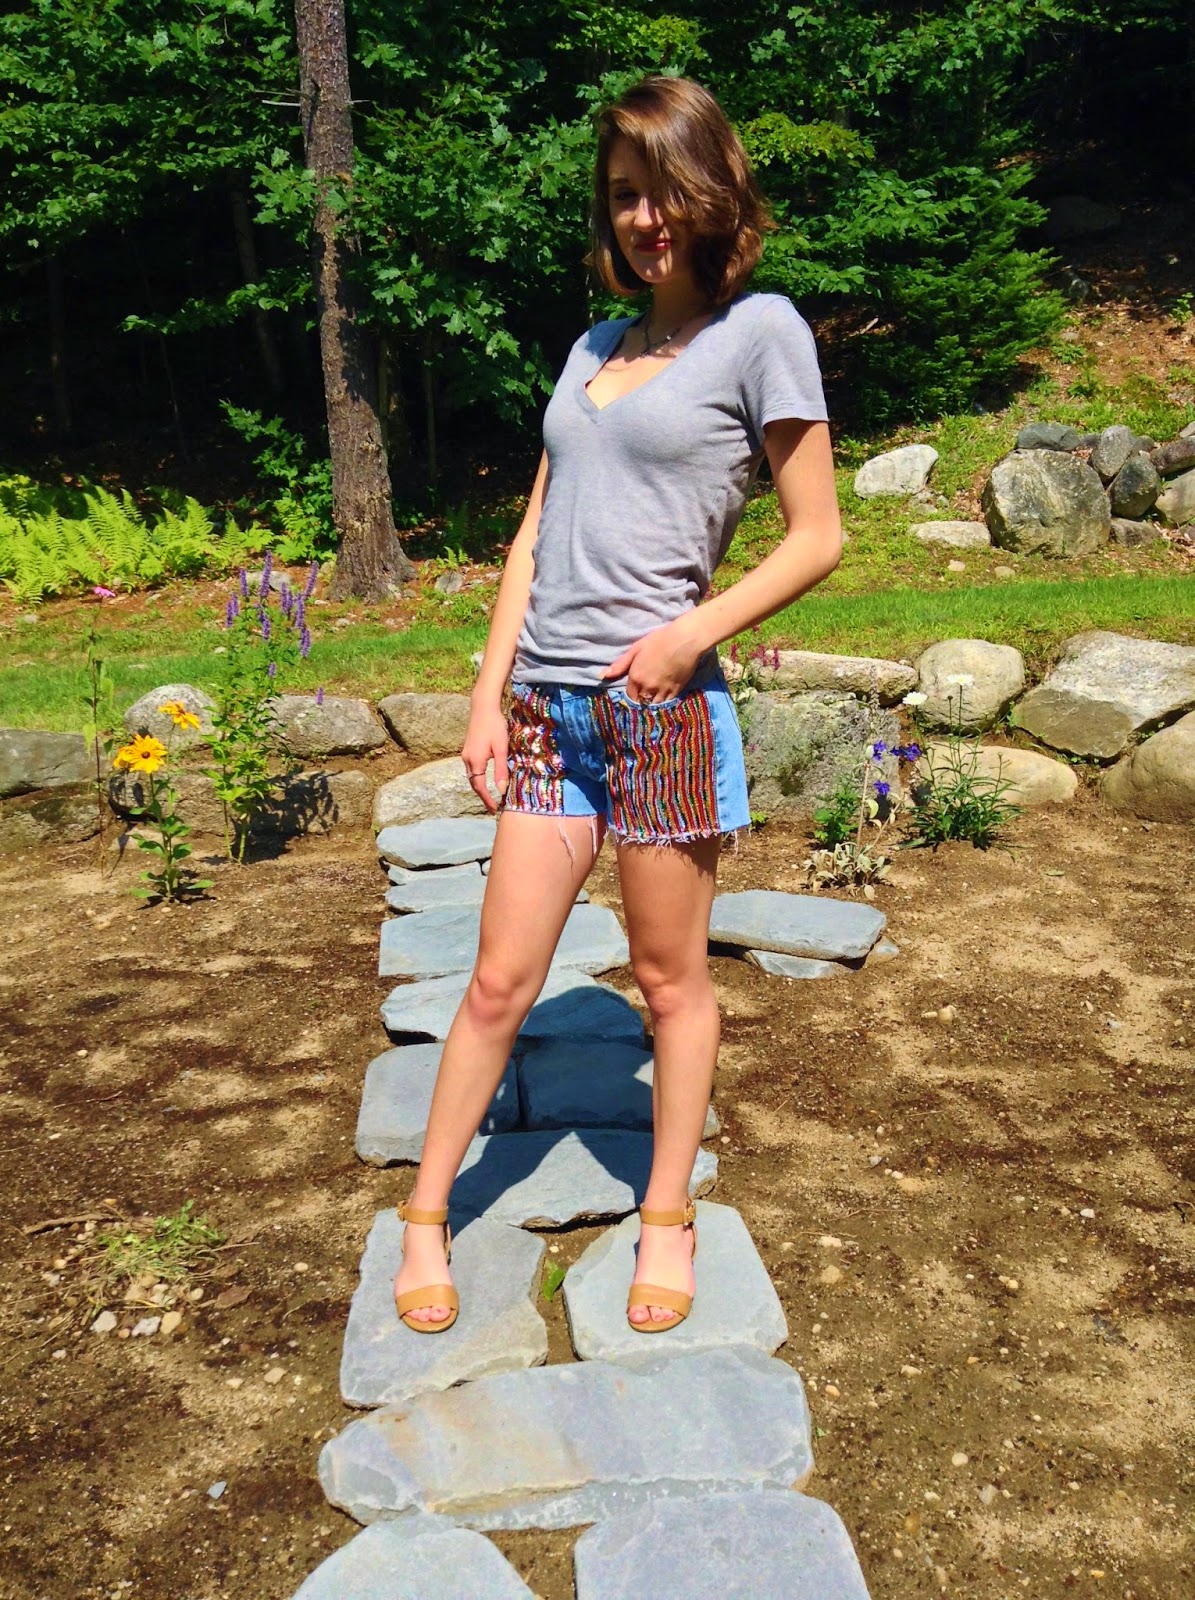
          The final pair of denim shorts I made this summer took the longest to make. I must have spent at least 12 hours sewing each individual strand of sequins on one side...then again on the other side.


          Needless to say, I did not tackle this project all in one day! I spent a few hours a day on my bedroom floor stitching sequins and listening to a Pandora station of The Weeknd, Trey Songz, Drake and Miguel. The perfect music, of course, to listen to while embellishing what I have deemed my Party Shorts. Since sequins aren't a typical, everyday adornment, I designed these for special occasions and nights of dancing. I discovered they look best with a simple tee to offset the sparkle and low heels so as not to look too "club-y."


Friday, August 8, 2014

DIY Denim Cutoffs - Rockstar Style


          The next pair in my series of DIY denim cutoffs was a rockstar style, complete with studs, dye and a little sparkle. For a grungy look, I ripped the bottom edges and dip-dyed the bottom of the shorts. Then, I covered one back pocket with trim and glued star studs to the front with fabric glue. It was a pretty simple design, but time consuming no less.


Thursday, August 7, 2014

DIY Denim Cutoffs - Hippie Style


           I've had less time for sewing this summer (as well as blogging) since I've been freelancing, interning and endlessly apartment hunting for the upcoming school year. However, I still managed to make a few pieces before I left home for a month with my older sister in NC. My first projects were actually due in part to my sister, as I found a few pairs of her high school bell-bottoms in a pile of  old clothes. I've wanted to revamp old pairs of jeans into embellished, cutoff shorts for a while, so the hardest part was deciding which of my ideas I would choose.

            For the first pair, I created a hippie-inspired design with trim, embroidered flowers, iron-on appliques and lace. I had a little trouble with some of the iron-ons sticking, so I secured them with fabric glue. Other than that, I was really happy with how they came out!


Thursday, June 12, 2014

DIY: Valentino SS14 Embellished Leather Headband


        One of my favorite Spring 2014 collections as a whole was Valentino. It had all the cornerstones of my spring wardrobe -- lace, crisp collared shirts, bohemian prints, suede and strappy sandals. But what really finished every look was the red headband atop each model's head, embellished with studs. The studs reminded me of some gold crest buttons I had and I immediately decided to recreate the Valentino headband.

Photo credit: Style.com
        You can create your own embellished headband by following my DIY "how-to" below. To start, you will need a plain thick headband, red suede or leather fabric, fabric glue, a sewing needle, thread, fabric scissors, and gold buttons.


Step 1: Cut the leather fabric into a rounded strip that will cover the headband.
Step 2: Position the fabric on the headband and tack it in place with glue on just a couple edges. 
Step 3: Sew each button onto the fabric, matching the Valentino pattern. The number of buttons you use is up to you, depending on how closely you space them. Make sure they are sewn securely. 
Step 4: Once all of the buttons are sewn, glue the rest of the fabric edges to the headband. Pull the fabric taut as you glue to ensure everything will stay in place. 
Step 5: This is an additional step, so you may not find it necessary. The buttons I used are a bit bulky so they moved around and jingled on top of my head. Since I'd rather not sound like a Christmas caroler, I tacked each button in place with fabric glue.


       Once I finished my headband, it was time for a photoshoot! I put on my most Valentino-esque outfit -- a sleeveless oxford, a new patterned maxi dress and t-strap pointy toe heels. I figured I couldn't go this far without the ear-covering, low ponytail, so I sprayed back any flyaways and completed the look. Thanks to my talented brother for the photos!


Photographs courtesy of J. Ortakales Photography

Thursday, November 21, 2013

Throwback Thursday: Bottle Cap Tee Inspired by Jessie J


          I meant to post about this DIY project many months ago, but alas, I've been crazy busy with fashion week, two internships, several trips to Boston, and launching my Etsy shop! So what better way to finally show you my bottle cap tee with a Throwback Thursday!

           It was probably over a year ago when I stumbled upon a picture of Jessie J wearing a cutoff sweatshirt adorned with bottle caps. Now, I love every fashion decision this girl makes. I dressed up as her last Halloween (right down to the Union Jack lip tattoo)! But this one was beyond perfect. It wasn't a stunning red carpet gown or elaborate performance getup, but it was pure genius! I'd never seen anything like it! Sure, people add studs, jewels, and leather to shoulders all the time, but you rarely see them using their old bottle caps on clothing. I knew right away that this was going on the top of my DIY to do list.

My inspiration...

          Unsurprisingly, I obtained the bottle caps for my DIY through some college kids who had hundreds saved up from all their parties. And luckily for me, they seemed to dabble in many varieties of beer. This made for great colors and some really cool designs! Of course, there were a few old-school soda bottle caps in there too, wink wink.

          Being the perfectionist that I am, it took me some time to plan out the arrangement. There was no way I'd have too many red ones together or two Bud Lights in a row! Other than that, making this shirt was pretty easy. I punched holes in the caps with tacks and stitched them in place with a needle and thread. Not many supplies needed, just a bit of patience.

My rendition...

Photography courtesy of Jeff Ortakales.
See more of his work at jortakalesphotography.com

Saturday, November 16, 2013

Nail Art DIY: Inspired by Lizzy Caplan's in Bachelorette


          Aside from the humor, one of my favorite parts about the movie, Bachelorette, was funny girl, Lizzy Caplan's manicure. For all 87 minutes, I couldn't stop staring at her nails, hoping the camera would get just a bit closer. What I loved about this simple, yet trendy, design was that it's an unexpected take on the popular burgundy red nail color. It looks sophisticated and elongates the nails for more delicate looking fingers.

           Of course, I had to do this design on my own nails immediately! Here's my quick and easy DIY for you to try her look!


Nail polish I used: 
NYC Long Wearing Top Coat
Circus by Andrea's Choice in "Reverso"
Spoiled in "I Don't Drink Cheap Wine"


Step 1: Paint one to two coats of burgundy polish, depending on coverage.
Step 2: Let nails dry completely. I actually waited a day for them to fully set, to avoid any possible smudging with the contrasting polish. Cut round silvers of tape and place them on your nails just above your cuticles. 
Step 3: Paint the white polish only on this bottom section of your nails. If needed, add another coat of white polish.
Step 4: Let nails dry completely. Apply a top coat and you're finished!


Wednesday, October 16, 2013

Announcing Jenny's Open Closet on Etsy!


         Consider this the official press release for my Etsy shop! Since I'm currently taking time off from school, I needed a creative project to benefit my spare time. It's a bit hard finding a part time, no degree required job out here in the mountains of NH, so I decided to turn all the jewelry I make for fun into a business!


          My designs revolve around re-purposing old pieces to make new, stylish ones! So far, I have a collection of nine jewelry pieces, all made with materials from old jewelry, my own bead stash, and stones from a local gem shop. Each necklace, pair of earrings, and bracelet is unique because I only have so many of the same supplies. They all fit different personal styles and most can be worn for both everyday or special occasions.

          I'm also working on a clothing collection of reconstructed vintage, like the pieces I made this summer! So stay tuned for updates to come! Until then, here's a look at some of the jewelry on my Etsy shop right now...

Purple Gems Duchess Statement Necklace - $36.50

Fringe and Rhinestone Statement Necklace - $26

Dangling Triangle Stone Pendant - $37.75

Twisted Stone Pendant with Pearls Necklace - $31.25

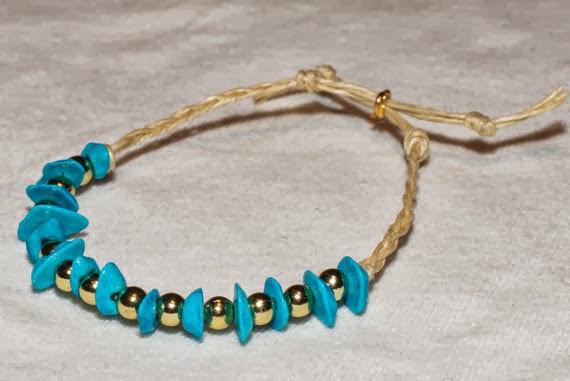
Braided Turquoise and Gold Beaded Bracelet - $10.75

Photos courtesy of Jeff Ortakales Photography

Friday, August 30, 2013

DIY: Galaxy Nail Art

         Every time I change my nail polish lately, I like to try something different than just a solid color. Last week, I created a galaxy print, as it's one of my favorite patterns for clothing. I'm going to show you how to do it on your nails!

What you'll need:
- black, white, orange, light blue, and purple nail polishes
- a very thin, shimmery nail polish
- clear top coat
- makeup sponge
- pencil 
These are the colors I used: Revlon - "Black Lingerie," Circus by Andrea's Choice - "Reverso," Essie - "Meet Me at Sunset," Essie - "Lilacism," Color Club - "Disco Dress," L'oreal - "The Temptress' Power," NYC - "Extra Shiny Top Coat."
Step 1: Paint nails black. Let dry.
Step 2: Using the makeup sponge, dab small splotches of the blue onto each nail. Let dry.
Step 3: Repeat this dabbing technique with the orange and purple polishes, drying between each color. 
Step 4: Dip the tip of a pencil into the white polish to create small dots that look like stars. Let dry.
Step 5: Paint a light layer of the shimmery polish on top of design.
Step 6: After the polish has dried for a considerable amount of time, apply top coat to finish. 

And voilà! You have nails that are out of this world! 

If you're like me and can't get enough galaxy print, shop some of my choices below:


Friday, August 23, 2013

Reconstructing a Shirt into a Skirt


       The last piece in my Summer Reconstruction series is a velvet shirt that was desperate for a makeover. When I found this top, I really liked the color and texture. The velvet has a cool squiggly imprint, however the style of the shirt was all wrong. Using this fabric for a top is outdated, so I realized that what this garment really needed was a total re-purposing. I envisioned a piece that I could wear going out or on a date and created a simple, fitted miniskirt.


        To transform this shirt, I cut the top half off just below the sleeves. This left me with a piece of fabric almost ready to wear as a skirt, but in order for it to fit better, I needed to do a bit of sewing. I put the skirt on, pinned one side to fit against my leg, and sewed a seam there. Next, I folded the raw edge of the waist and sewed it for a clean waistline. Because the fabric is very stretchy, I needed to take in each seam a little more than most fabrics.


Thank you to Naomi Kolok for taking and modeling in the photographs featured in this series! 

Saturday, August 17, 2013

Reconstructing a Skirt into a Dress


      My favorite piece that I've redone this summer is a skirt that I turned into a dress. I had a bit of difficulty deciding on the style I wanted because the skirt had so much fabric to work with. There were many ways I could drape it or add sleeves, but I finally decided to stick with a very basic style that could be worn a few different ways. This way, I could wear it with or without a belt, move the straps to one side, or wear it without straps at all.


       The skirt originally had a lining, so I cut it all off to make the material lighter and easier to work with. Then, I added straps at the waistband with thick, black ribbon. Lastly, I cut a long piece of thin ribbon to use as an optional belt. 


Thank you to my beautiful cousin Naomi Kolok for modeling in these pictures!